

I’ve been eyeing up powder coating guns for a while and was keen to lay my hands on one. It looked useful for painting all those small bits that are needed on all the projects we have. Sure its easy to go to Supercheap Auto and buy some cheap cans of spray paint, but it doesn’t last or gives it that nice glossy finish.
Unfortunately, no -one in NZ makes a DIY gun so I was faced with importing one from the states. The Chicago Electric Powder Coat gun looked great, but cost more to ship it to NZ that the cost of the unit !
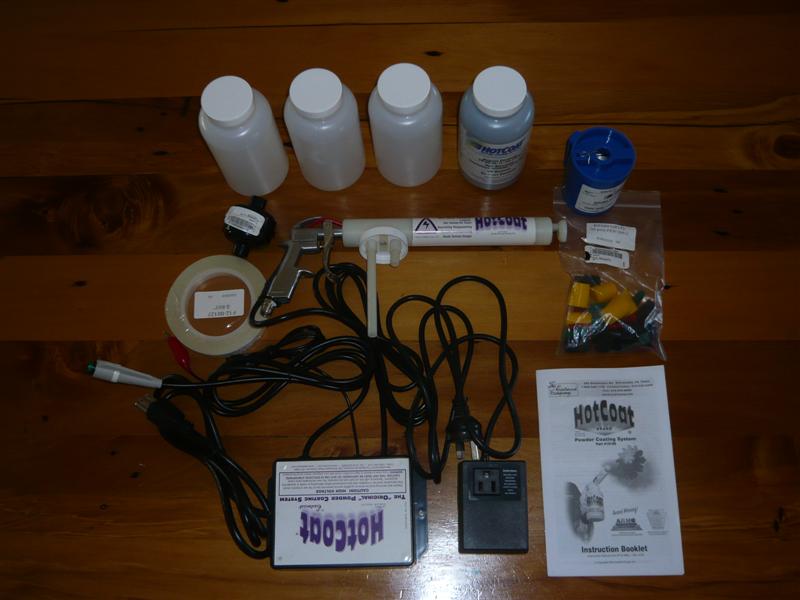
I decided I’d start with a smaller unit, the Eastwood Hot Coat gun and discovered a couple of companies importing products from Eastwood. Impact Sales offered me the Deluxe Kit which arrived after a number of weeks. The kit that turned up was the Deluxe Kit but without the extra two colours. Only some black powder coating was included.
The first problem was to deal with the different voltage supply we have here (220V) instead of the 110V that the kit was designed for. There are plenty of transformers available to step the 240V down to 110V, but most seemed very expensive. I found on Trademe an Auto transformer for $30. Any transformer will do as the current requriements are very low. Mine was rated at 100 Watts which is probably lots more than I need.
One problem with these cheaper units though is that they don’t have an earth lead, which is essential. Fortunately the unit I brought had the earth socket installed, and so I opened up the unit (yay!! just hate those made in China sealed units) and added a new 3 core cable, and soldered this in place.
To stop the cord pulling back through, I slid on an o-ring and wrapped this in vinyl tape, which when the cover is placed back on, prevents strain being put on the soldered connections inside.
After all of that, I plugged it in and it tested just fine.
Of course thinking about this, I suspect that the power unit is just a capacitive voltage doubling unit, generating the 9KV. Plugging into the 220V, my just end up with 18KV instead. Some of the other units for sale use about 25KV, but I wasn’t about to risk it … maybe another day ..
The rest is pretty simple, I had a bellhousing cover plate as test piece. Firstly I sandblasted it, then made sure not to handle it with my bare hands.

The unit was plugged in, and the airsupply set up. It calls for about 10psi which is pretty low. Unfortunately my pressure regulator was playing up .. so had to fix that first.

Turned on the oven, (I brought this years ago at an auction and use it for curing paint, and drying all manner of stuff.) and waited for it to heat up. I was worried that it wouldn’t get hot enough as its supposed to be 232 degC, so I just wound it up full bore and waited.
Once ready, I placed the powder in the cup, connected the earth wire and begin painting .. piece of cake !! It took about a minute to make sure it was all covered and then I popped it in the oven.
Cleaned the gun with compressed air and put it all back in the box. I just love the way there is no mess and its so easy to clean up.
Within 5mins the paint was flowing, turned it down a little, waited 20mins, turned off the oven and let it cool down.
The results were great .. just like a bought one !! Much much better than spraying and it was so fast with very little cleanup. I’m sold !!
Can’t wait to try some other colours.
We’ll see how it goes with bigger items .. like my son’s wheel rims.